Dreamweaver

View and set frameset properties

Use the Property inspector to view and set most frameset properties, including the frameset title, borders, and frame sizes.

Set a title for a frameset document

  1. Select a frameset by doing one of the following:
    • Click a border between two frames in the frameset in the Document window’s Design view.

    • Click the border that surrounds a frameset in the Frames panel (Window > Frames).

  2. In the Title box of the Document toolbar, type a name for the frameset document.
    Enter a title for a frameset in the Title box of the Document toolbar.

    When a visitor views the frameset in a browser, the title appears in the browser’s title bar.

View or set frameset properties

  1. Select a frameset by doing one of the following:
    • Click a border between two frames in the frameset in the Document window’s Design view.

    • Click the border that surrounds a frameset in the Frames panel (Window > Frames).

  2. In the Property inspector (Window > Properties), click the expander arrow in the lower-right corner and set the frameset options.
    Borders
    Determines whether borders should appear around frames when the document is viewed in a browser. To display borders, select Yes; to prevent the browser from displaying borders, select No. To allow the browser to determine how borders are displayed, select Default.

    Border Width
    Specifies a width for all the borders in the frameset.

    Border Color
    Sets a color for the borders. Use the color picker to select a color, or type the hexadecimal value for a color.
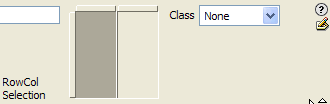
    RowCol Selection
    Sets frame sizes for rows and columns of the selected frameset, click a tab on the left side or top of the RowCol Selection area; then enter a height or width in the Value text box.
    Set frame sizes in the RowCol Selection area of the Property inspector.

  3. To specify how much space the browser allocates to each frame, select from the following choices in the Units menu:
    Pixels
    Sets the size of the selected column or row to an absolute value. Choose this option for a frame that should always be the same size, such as a navigation bar. Frames with sizes specified in pixels are allocated space before frames with sizes specified as percent or relative. The most common approach to frame sizes is to set a left-side frame to a fixed pixel width and to set a right-size frame to relative, which enables the right frame to stretch to take up all the remaining space after the pixel width is allocated.
    Note: If all of your widths are specified in pixels, and a visitor views the frameset in a browser that’s too wide or too narrow for the width you specified, then the frames stretch or shrink proportionately to fill the available space. The same applies to heights specified in pixels. Thus, it’s generally a good idea to specify at least one width and height as relative.

    Percent
    Specifies that the selected column or row should be a percentage of the total width or height of its frameset. Frames with units set to Percent are allocated space after frames with units set to Pixels, but before frames with units set to Relative.

    Relative
    Specifies that the selected column or row be allocated the rest of the available space after Pixels and Percent frames have had space allocated; that remaining space is divided proportionally among the frames with sizes set to Relative.
    Note: When you select Relative from the Units menu, any number you’ve entered in the Value field disappears; if you want to specify a number, you must re‑enter it. If there’s only one row or column set to Relative, though, there’s no need to enter a number, since that row or column receives all the remaining space after the other rows and columns have space allocated. To be certain of full cross-browser compatibility, you can enter 1 in the Value field; that’s equivalent to entering no value.